Kathryn Lemaster

Art and Design

  • Home
  • About
  • Services
    • Interior Design
    • Production Design
  • Online Course
  • Portfolio
    • Interior Design
    • Production Design
  • Press
  • Praise
  • Journal
  • Connect

Hillcrest Cottage Featured on House of Turquoise!

Happy summer to you! We’re officially halfway through the year now and what a whirlwind it’s been so far. I don’t see things slowing down any time soon with our little one on the way, arriving mid October. Yay! We did just get back from a much needed East Coast vacation however, and there’s lots of Cape Cod and New York City inspiration from that on the gram!

I was so grateful to have the Hillcrest Cottage project featured in At Home in Arkansas “Bright Ideas” issue last month. I was still reeling from that excitement when to my surprise and delight, the lovely Erin from House of Turquoise reached out wanting to feature this colorful cottage as well!

What’s more though, she will be unveiling a few bonus shots from the shoot that weren’t included in the original article. So if you thought you’d seen all of this project – think again my friend! Head on over to House of Turquoise and don’t miss the bonus detail shots and one of the dining room, too!

Thanks for reading, and I hope your spirits are lifted by the happiness of this colorful home!
SHARE

MORE TO LOVE:
Oh Happy May!
House of Turquoise Feature: Before & After Reveal of Rustic Modern Bath
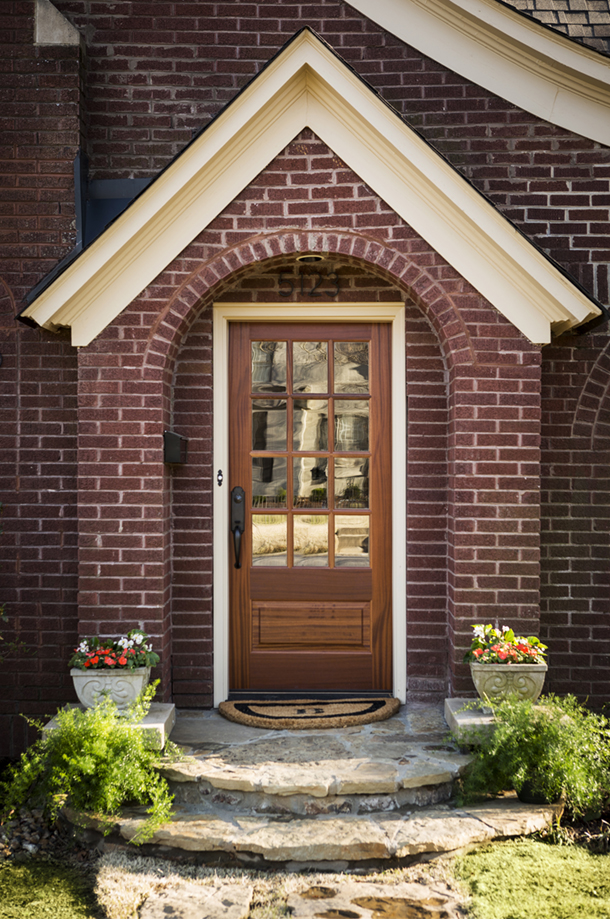
Fall Decor Inspiration: At Home in Arkansas front porch feature!

“Heirloom Revival” Guest Room & Bath Reveal on House of Turquoise!

Ready for the never-before-seen Guest Bed and Bath photos from the beloved Heirloom Revival project published by At Home in Arkansas Magazine last year?!

RP_aha_150325_2010_610Good! Because I have been waiting a year to share them with you and I’m so excited I can hardly stand it!

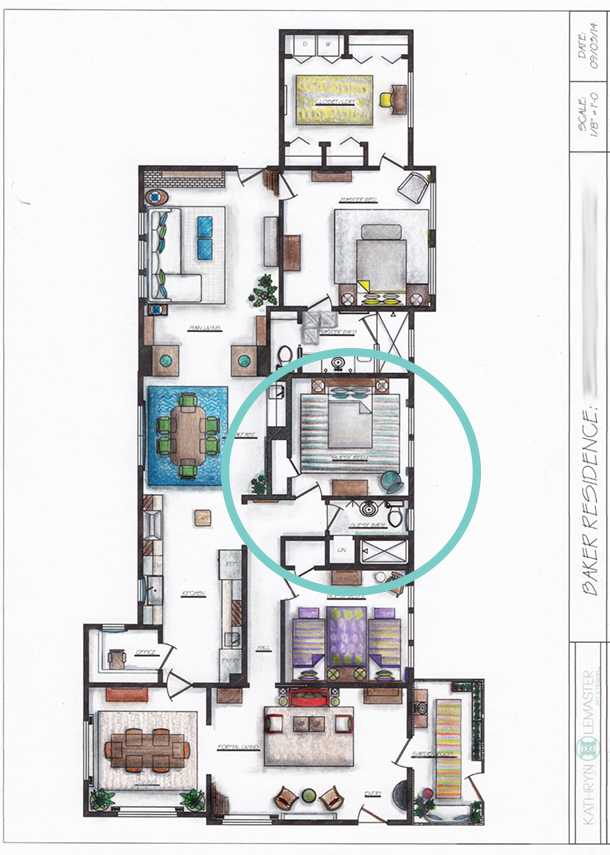
When it comes to publishing, sometimes there are a few rooms from a whole home project like this that don’t make the cut due to page numbers and editorial content. Rich in unique design details and historic family heirlooms, this aqua hued guest suite – located off the main hall in the center of the home – was just such a duo of rooms when the story was originally published.Baker_Redesigned Floor Plan_03.2015_610I wanted to give the rest of the house a full year of fanfare before adding these two hidden gems to the mix!

Then of course, I had to find the perfect place to introduce them to the world. I’m so honored to have everyone’s favorite aqua tinted blog bringing you these never-before-seen spaces for the first time: House of Turquoise!!

Without further adieu, please click above to head on over to Erin’s blog!

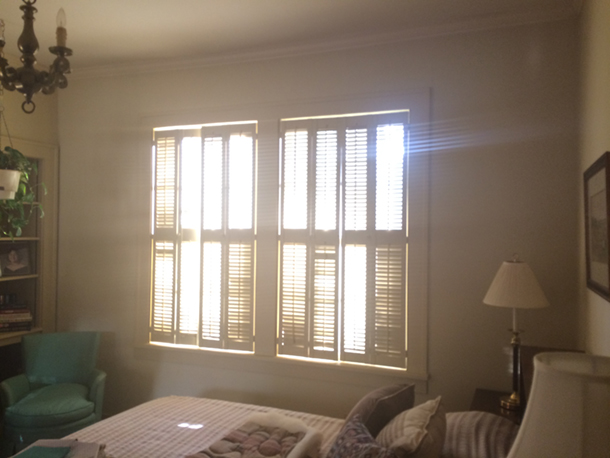
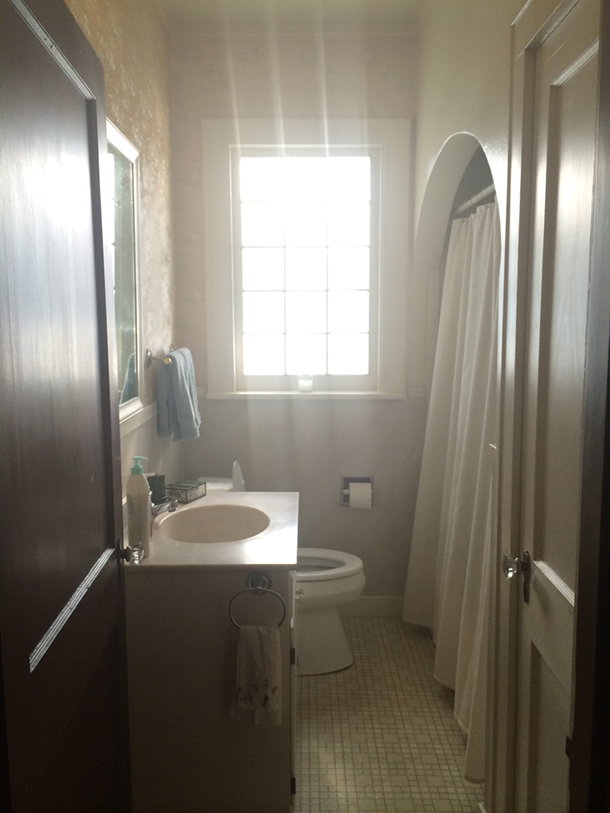
I’ll leave you with a “before” glimpse of each space…

Existing_Middle Bedroom windows_610

Existing_Guest Bath_610

SHARE

MORE TO LOVE:
House of Turquoise Feature: Before & After Reveal of Rustic Modern Bath
Guest Room/Office Before & After Reveal
Kitchen Styling Tips on At Home in Arkansas Blog

Fall Decor Inspiration: At Home in Arkansas front porch feature!

Happy October!!

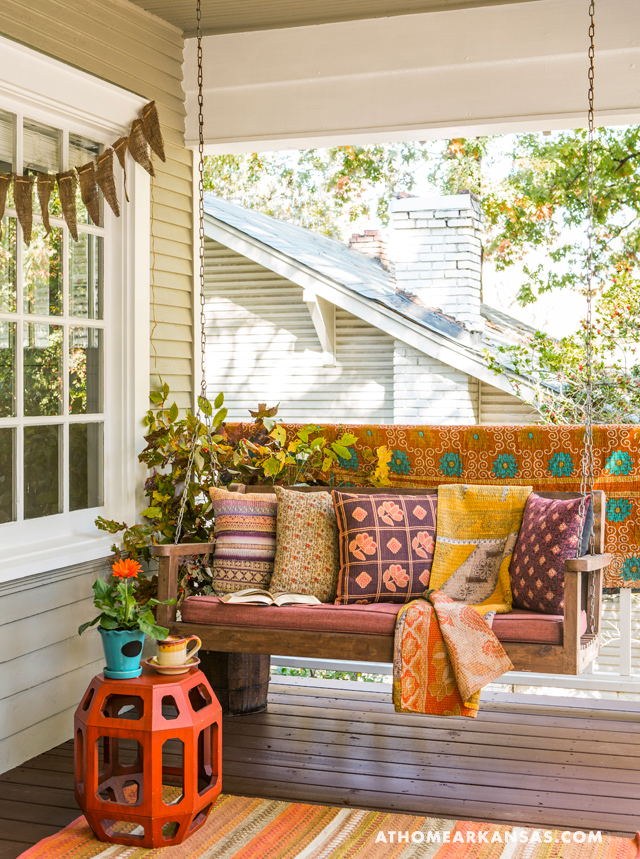
Fall is my absolute favorite season, of which October always feels like the official kick-off to me. It’s the best month of the year in my book, which is why I am especially thrilled to have a fall decor project included in this month’s issue of At Home in Arkansas magazine! Snatch up a copy and mosey on by their website to read the full feature – aptly titled “Welcome to Fall!” – for more lovely photos and fall decor ideas!

Here’s a preview of “Look #1: Cheerful, Warm, Eclectic” – designed my moi and styled with the expert assistance of Editor in Chief, Chip Jones, topped off with glorious photography by Rett Peek!

RP_aha_141107-6793a

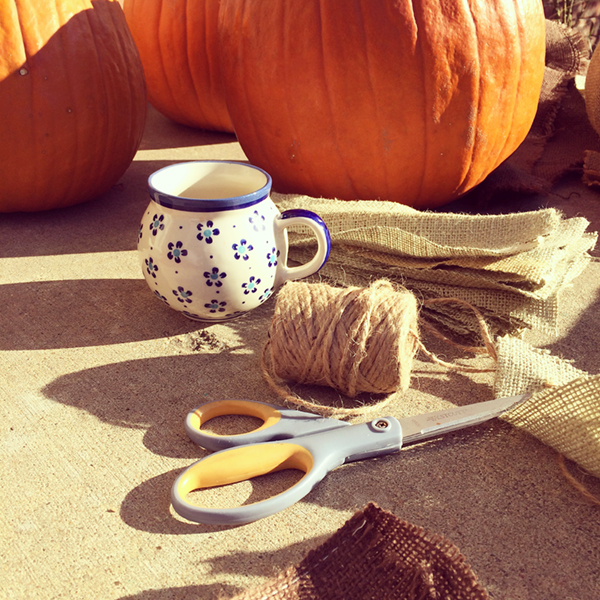
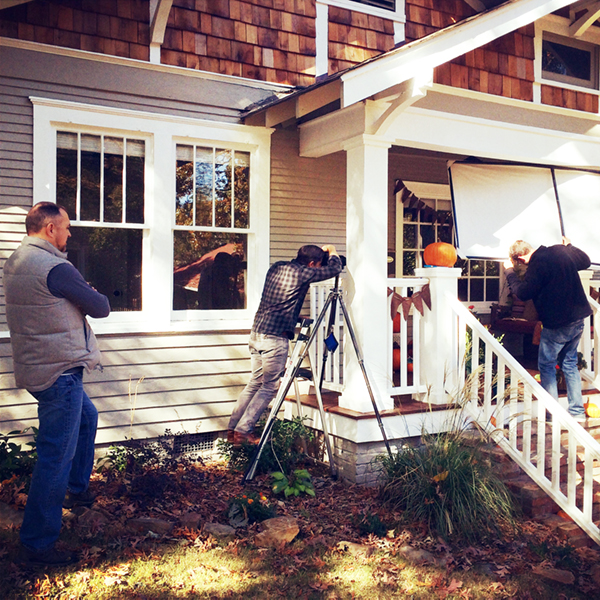
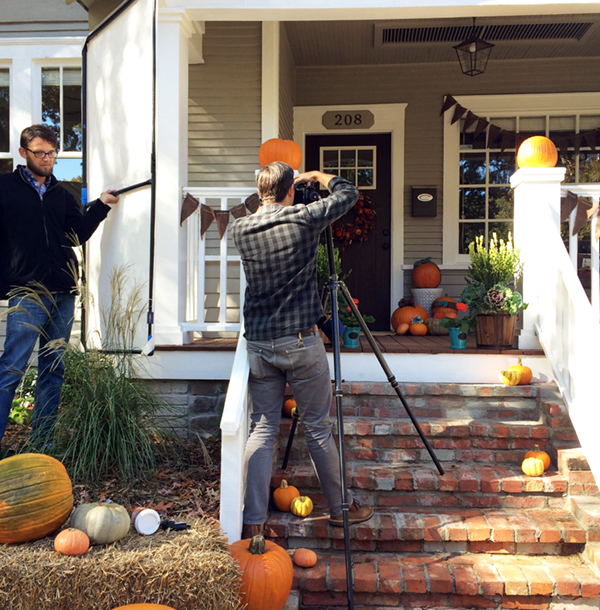
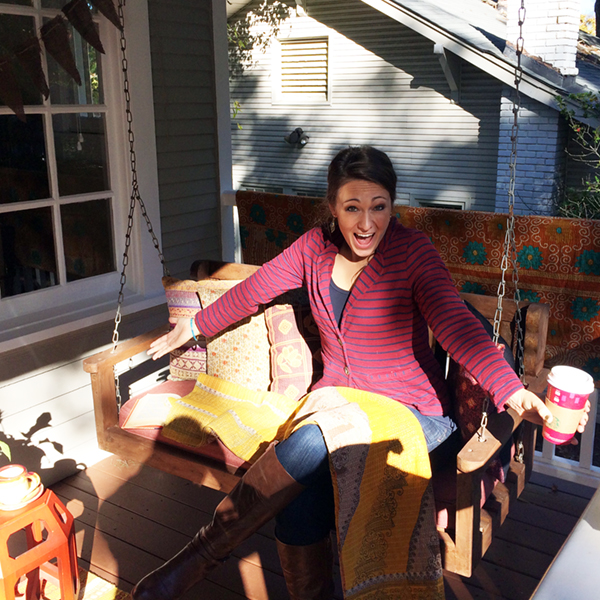
Behind the scenes bonus material! (Crafting, coffee consumption, and amature photography by moi as well…)

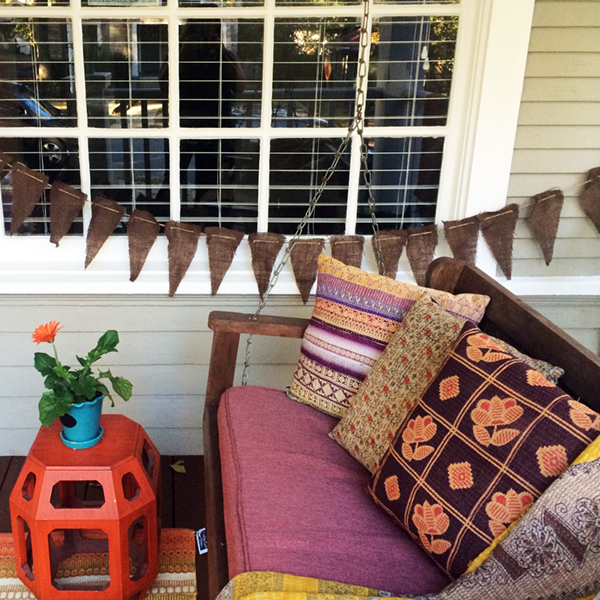
IMG_1921_Fall craftingBurlap and twin garlands and pumpkin wraps in progress. Produce hunted down at various pumpkin patches and grocery stores. Materials found at local craft stores and my garage. 😉

AYC Quilts and PillowsNothing like a few handmade Kantha quilts and pillows made from recycled Indian saris to warm up a space! Available at my favorite yoga studio, Arkansas Yoga Collective.

IMG_2063_Behind the Scenes 5Styling away! My estate sale retro side table had to come along, of course. So did a few fun rugs from Cynthia East Fabrics. The Gerber daisy and ceramic planter were less than $10 combined at Home Depot. #score

IMG_2121_Behind the Scenes 1Ready, set, shoot!

IMG_2112_Behind the Scenes 3The pros, making that photo magic.

IMG_2096_Behind the Scenes 4That’s a wrap!

Make sure to visit At Home in Arkansas to read about this fall front porch design and see more glorious, non-amature photos. 😉 We’d love to hear your thoughts or questions about sprucing up your own space for fall, so feel free to leave a comment below or on At Home’s page.

Thanks for hanging out on the porch with me. This was fun. It’s going to be a great fall!

SHARE

MORE TO LOVE:
Kitchen Styling Tips on At Home in Arkansas Blog
Pumpkin Spiced Inspiration
Look-alikes: Glam Living Room

House of Turquoise Feature: Before & After Reveal of Rustic Modern Bath

Ladies and Gents, thank you ever-so-much for coming by on this special day for a very exciting  before & after reveal!

I am incredibly thrilled to have the one and only Erin Olson Moser from House of Turquoise unveiling this project in terrific HOT style by featuring the after photos for the very first time today!!

This is going to be so much fun! I’m sharing the before photos and design plan here – then you can hop on over to House of Turquoise for the amazing after photos, photographed by Karen E. Segrave of KES Photo. If you’re coming over by way of HOT, welcome!! I hope you enjoyed the finished result and will relish your regressive design “meal” as you take a peek back at how it all began.

Meet my friends, the  Bollens, a wonderful young family with whom I had the pleasure of working on this project. Jessica and Daniel were new homeowners and ready to kick it up a notch or 10, functionally and aesthetically, with their master bathroom. Take a step back with me to their original master bath:

There were many reasons to bid farewell to the existing layout and finishes. From the brown tile and cave-like shower to the ho-hum single sink vanity, it was simply time for an update.

They opted for a DIY style design plan, as they are savvy do-it-yourself-ers. They also enlisted the help of skilled craftsman and builder, the talented Mr. Chandler Tedder, to oversee the remodel.

I wanted to include their wishlist items (make-up vanity space, double sinks, glass shower, display and hidden storage…) while incorporating their taste and style, which was one of my favorites – a rustic-modern fusion! After collecting their input, I set to work designing their dream bath and presented them with a design concept which included dimensioned drawings, a concept board with selection options, material samples and a resource shopping list.

Here is a sampling of a few of the new selection options to give you an idea of where we’re headed:

Below are the concept drawings illustrating the new design!

Can you image it now? Thanks to the Bollens and Chandler, who took it from a concept to a reality, Karen, who captured it, and Erin, who’s sharing it today… you don’t have to just imagine – you can go see it, right now!! Jump on over to House of Turquoise for the grand after reveal!!


SHARE

MORE TO LOVE:
“Heirloom Revival” Guest Room & Bath Reveal on House of Turquoise!
Kitchen Remodel Before & After Reveal, Part 1: Before
Hillcrest Cottage Featured on House of Turquoise!

Kitchen Styling Tips on At Home in Arkansas Blog

If you enjoyed our Before & After feature in At Home in Arkansas this month, you’ll definitely want to click on over to their blog today for a bonus feature from this family friendly kitchen design!

They will show you how we built in flexible accessories to be able to swap out styles in a pinch, creating two different looks and feels. Hopefully you’ll get some ideas on how this could apply in your home!

Click on the image below to connect to their post, “Styled Two Ways“!


SHARE

MORE TO LOVE:
At Home in Arkansas Before & After Feature is online!
Fall Decor Inspiration: At Home in Arkansas front porch feature!
Kitchen Remodel Before & After Reveal, Part 1: Before

Guest Post on House of Turquoise!

Good morning and happy September to you all!

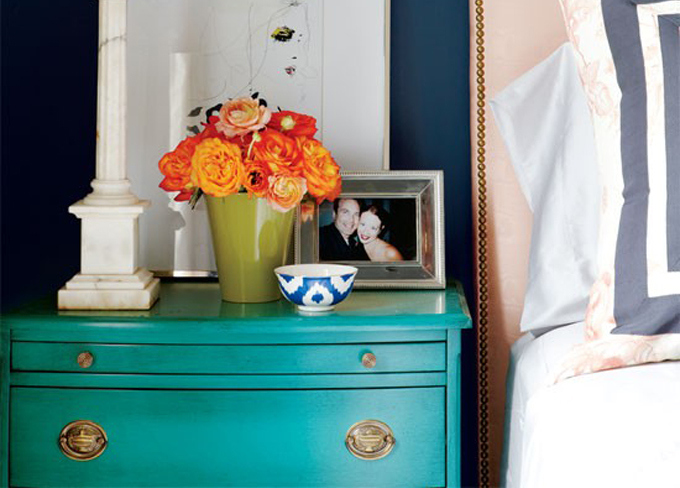
Today, I am so incredibly thrilled to be guest posting on one of my all-time favorite blogs, (drum roll, please) House of Turquoise! What a privilege.

The lovely lady behind HOT, miss Erin Olson Moser, is a happy new mama to sweet baby Wesley as of a couple weeks ago. Congrats again, Erin!
Needing to take a little time off with husband and baby, Erin set into place a great line-up of guest posters to fill so she can spend this precious time with her new little family.

Though I was just flabbergasted that she asked me to be among the guest posters, I was truly honored, and had so much fun putting together a special post for HOT.

So without further adieu, please check out my guest post by tuning in to the one and only House of Turquoise today (and every day really! Seriously, if your not already, you should follow HOT. That’s my bit of advice for the day.)

87186942756239048_8uIdJuHv_c_peppermentbliss_crop_sm(via peppermint bliss)

If you’re stopping by my blog via HOT today, well then welcome! I’m so glad you decided to click on over for a visit. Please, make yourself at home, check out my blog and site, and feel free to leave a comment or shoot me a message here if I can answer any questions for you! So glad you dropped in, and hope to see you back soon. 🙂

If you’re hankering for more turquoise inspiration after browsing House of Turquoise – which I consider to be the mecca of this superior hue – you can always follow my Totally Turquoise board on Pintrest here, or check out my previous post on Turquoise, here!

Thanks again for being here today. I really and truly appreciate you taking time out of your busy day to slow down for a moment soak up some inspiration with me!

-K

SHARE

MORE TO LOVE:
Fall Decor Inspiration: At Home in Arkansas front porch feature!
Interview Feature on Wade’s Blog!
“Heirloom Revival” Guest Room & Bath Reveal on House of Turquoise!

Bench Project: Part 2

Picking up where we left off  in my previous post (Part 1)…

… while was waiting for my bench to dry, I worked on recovering the bench seat.

Step 1: Flip over and start pulling up the old fabric from the corners. Work your way around ripping up the fabric. Use scissors, pliers, or whatever tools needed to destroy any stubborn fabric refusing to surrender.

If there is another fabric layer discovered (like I’ve found on most of the treasures I pick up) simply repeat the stripping process until you uncover the actual “fluff” of the cushion. It should look something like the stripped cushion above.

Step 3: To add a little extra substance to your cushion, unroll a piece of quilting batting, lay the seat cushion and existing fluff face down on the batting, and cut out a piece of batting around with with about a 2 inch margin for wrapping around. Starting with the corners, wrap the batting tight around the edge and staple into place. Trim any excess batting.

Covered with a layer of batting, the seat should look something like this.

Step 4: Roll out your new fabric of choice, face down, over a flat clean surface. Place your batting covered seat cushion face down on the portion of the fabric you want to use. Depending on the pattern, you may want to hold in place and flip over to line up or center the pattern on the seat. (I chose a solid white linen I had extra yardage of from another project.) Cut out your fabric around the seat cushion, with a 3-4 inch margin to give you wiggle room to adjust the pattern placement. Trim off any excess fabric.

Step 5: Similar to step 3, pull tight, wrap the fabric around the edge, and staple in to place. Begin with a corner, follow with the corner diagonally across from it. Then the third corner, then the last corner diagonally across from it. Picture stretching an artist canvas – you want it pretty tight! Then fill in with as many staples as needed along the edges to hold tight and not pucker. It should now look something like the seat cushion above

Step 6: This was a total experiment. I wanted to do an insert border of grosgrain ribbon, without cutting, sewing, etc. I would have normally tried ironing it on with Stitch Witchery, but alas, all I had in my cabinet at the moment was Liquid Stitch. (Which was also a total experiment.) I laid out the ribbon where I wanted it, pulling tight, pinning, and pleating to turn corners as I went. Once it was all laid out, I went back and turned up the edges to squeeze the glue under. I removed the fabric pins after the glue had set but was not completely dry.

Step 7: Once the seat cushion and the bench base had both dried enough to handle, they were finally reunited!

I am quite happy with my new bench. Only thing I would have done differently would have been to try sewing or using Stitch Witchery to attach the ribbon to the top, as I was not completely happy with how the Liquid Stitch fabric glue dried. It was supposed to dry “invisible,” but I can still faintly see the glue lines through the ribbon even after it dried for over 24 hours. What can I say – that’s why an experiment is an experiment – they can’t all go swimmingly. It’s not that visible, but as a perfectionist I had to mention it. 😉

So there you have it folks, a $10 bench gets a makeover with for no more than the extra materials I already had on hand and a few hours spent in the spring weather on my back deck. Not too shabby!

SHARE

MORE TO LOVE:
Bench Project: Part 1
House of Turquoise Feature: Before & After Reveal of Rustic Modern Bath
Barstool Fix

Bench Project: Part 1

I hope you all had a special Memorial Day holiday! I surely did. Spent alot of time with friends and family and even extended the long weekend a day longer by following it all up with a surprise party for my parent’s 30th anniversary Tuesday night. Such fun!

But as you may have seen if you follow my Facebook, I began the weekend with a little “crafting” on my back deck. I wanted to jump into the beautiful weather as fast as possible while still doing something productive, so I tackled a few fixer-upper furniture projects I’ve been meaning to get to for a while.

I started with this sad little bench that I picked up for $10 at an estate sale a couple months ago.

It was the perfect little bonus piece I needed to fill an empty space in the kitchen to serve as extra pull-up seating, a surface for the purses that get tossed or a shield for the shoes that get kicked off.

It had potential… just needed a little TLC.

Step 1: Detach the top from the base, in this case by unscrewing the screw in each corner underneath the bench with a flat-head screwdriver.

Step 2: Prep the “splash zone” for painting. I layered plastic trash bags over my patio table.

Step 3a: Assemble the troops. Liquid sander and applicator (rag or paper towels), paint of choice (with corresponding paint tools) and disposable gloves for the splash-inclined like myself.

Step 3b: Station your trusty guard dog is at his post to keep an eye on things and keep you company. This step is not required, but recommended for a more enjoyable painting experience.

Step 4: “De-gloss” the piece with liquid sander. This is a quick and easy way to clean the item and break through an existing top coat finish. It basically makes the surface better for paint to adhere to without the mess and elbow grease of sanding with sand paper.

Step 5: PAINT!  (Prime first if needed. I didn’t in this case as I planned on two coats of thick paint, so the first coat was like my primer.) I used a high-gloss oil base paint from Sherwin Williams (color: SW 6938 Synergy) as it was a color I had on hand and had used elsewhere in the kitchen. Oil base is harder to work with and takes longer to dry… but it sure is pretty. For easier clean-up and faster dry-time, I’d recommend latex paint or even spray paint if they have the color you need.

Step 6: Wait. Follow the dry-time instructions for whichever paint you use. I let the first coat dry overnight, and put a second coat on the next day.

Meanwhile… I tackled recovering the bench seat. Which I will cover in a Part 2 post tomorrow! 🙂

SHARE

MORE TO LOVE:
Bench Project: Part 2
House of Turquoise Feature: Before & After Reveal of Rustic Modern Bath
Barstool Fix

Souvenir

We made it to Dallas this past weekend to visit family, friends, and some favorite stores. It was a fantastic trip, mainly because of the people we saw, but also because of places we got to go.

Our lunch destination with friends after church took us to the Knox-Henderson area, which was just packed with wonderful stores. Among them being none other than the fun and funky Jonathan Adler!

Jonathan Adler

I have admired the shiny pretty things this brand has to offer for years via the web, but this weekend was my very first time to actually step foot in a store. Yep, it was an exciting moment. So of course I had to purchase something to remember the trip by.

Jonathan Adler Lighting

So after being torn between the $1,250 Mini Sputnik Chandelier and the $2,200 Giant Sputnik Chandelier (in my dreams…) I decided on a humble $18 coffee mug. Normally I would not spend $18 on a coffee mug, but after staring at the larger price tags hanging all over the store, 18 bucks started to look like a good deal for a drinking vessel.

Blue Carnaby Talitha Mug

So here is my beautiful little blue baby, the Blue Carnaby Talitha Mug, modeling a fresh pour of French Roast.

Close up

I love the bold graphics and of course love the navy and turquoise color combo.

Mug Shot

I’m quite thrilled with my first JA purchase and look forward to adding to my collection in the not-so-near future. Gotta start saving for my Sputnik light. 🙂

SHARE

MORE TO LOVE:
Ikea Love
Spring Inspired Color
Painting Party

YOU’RE INVITED TO KATHRYN’S E-PARTY!

Join the e-party below to get personal notes, news, decor advice and inspo from Kathryn and receive a FREE copy of Kathryn’s new e-book, “7 Steps to Design + Decorate like a Pro” as a party favor for joining!

YES, I’D LIKE A PARTY FAVOR!

So much growth around here this spring. 🥹🌿 P So much growth around here this spring. 🥹🌿 Plantly, personally, relationally, familialy, professionally, educationally, spiritually, recreationally, socially… so many ways. 🤍 

Liam love has ached from growing pains in his legs as he’s shot up taller this year, and I can’t help but think of many points over the last year I’ve cried out over the same thing in my own way, internally. It’s been a year of repotting and acclimating, shedding withering leaves, sprouting new ones unexpectedly, and pressing through rocky soil at times. But through it all, we water and tend to - our plants, our hearts, and eachother. We received tending to and watering, from our loving Gardener and from one another. We learn what that looks and feels like. We remember, we practice, and keep adding to each new discovery of what helps us thrive. Old downtrodden pathways healing, covered over with new growth, and new pathways (in at least my nervous system and brain that so needed it) being bushwhacked (as my friend recently wished me all the grace and success with 😂🙏🏼) and becoming more familiar: a new normal. 

We’ve been in our home sweet 1930’s cottage for a year now, and I am so incredibly proud of the ways we’ve each branched out and up, roots sinking in deeper through the dark and sometimes rough terrain, finding eachother even there and locking arms deep in the soil as well as holding hands with leaves reaching toward the light together, be it by sun or by moon. 🌳 

“they will be known as might oaks of righteousness, planted by Yahweh as a living display of His glory.” Isa. 61:3b

“and He sees to it that each seed gets a new body of it’s own and becomes the plant He designed it to be. “ 1 Cor. 15:38b

(PS! I released a new podcast episode this week sparked from the above verse. I share how the Lord’s been speaking to me through plant imagery / terminology, things I’ve been learning about our design for consistent watering / rewatering, my heart / ways I’m learning to relate now as I’ve been overcoming some old fear based, faulty thinking, that’s made room for new and beautiful growth. You can listen to it on Spotify on the Unhindered podcast or profile link!🪴)
Part 2 of this bright and happy retro-inspired kit Part 2 of this bright and happy retro-inspired kitchen before & after, cause I’m still not over it yet… 😍 #minttobe

•

#thatsdarling #vintagedecoration #vintagedishes #tilebar #fiestawear #kitchenremodel #kitchendecor #kitchen #kitchendesign #homeimprovement #interiorinspo #whitekitchencabinets #whitekitchen #kitchengoals #homesweethome #diydesign #theartofslowliving #thehappynow #flashesofdelight #diyhomedecor #verilymoment #pursuepretty #interiorstyled #interiordecor #interiordesign #kjlartanddesign
In the midst of a full and challenging season, tim In the midst of a full and challenging season, time stood still for a blissful 24 hr spring break escape with my loves, March 23-24. 🌿✨ 💦 🌸 ☀️🥹💞 We took Mabel Ann the Main Line, our sweet lil 1947 vintage camper trailer out on her maiden voyage before we start the reno updates! We were so happy in her little aluminum form, we didn’t want to leave! 🤍

#familymemories #springbreak2023 #lakecatherinestatepark #arkansasstateparks #thenaturalstate #thegreatoutdoors #chasingwaterfalls #vintagecamper #glampinglife #thatsdarlingmovement #optoutdoors #gonecamping #gonefishing #lifeisgood #arkansasonly
An unbelievably fun, cheerful and bright kitchen b An unbelievably fun, cheerful and bright kitchen before & after, hot off the press from @forrest_addison_roberts camera. 📷 😍 🙌🏼 💐 Absolutely loved going back to see this retro-inspired kitchen design that these creative clients and our fav contractor crushed implementing! 👏🏼 

•

#thatsdarling #vintagedecoration #vintagedishes #tilebar #fiestawear #kitchenremodel #kitchendecor #kitchen #kitchendesign #homeimprovement #interiorinspo #whitekitchencabinets #whitekitchen #kitchengoals #homesweethome #diydesign #theartofslowliving #thehappynow #flashesofdelight #diyhomedecor #verilymoment #pursuepretty #interiorstyled #interiordecor #interiordesign #kjlartanddesign
Weather report from an Arkansas wilderness, just a Weather report from an Arkansas wilderness, just after sunrise yesterday.🕵🏻‍♀️ Lovely weather we’ve been having lately - thunderous water with a 197% chance of falling. 💦😅

Adventuring with @forrest_addison_roberts will forever be one of my favorite reasons to wake up before dawn. 🌌 🥾 ☺️ 

•

#neverstopexploring #waterfallwednesday #arkansaswaterfalls #arkansasoutdoors #optoutdoors #hikinglove #coupleswhohike #arkansasonly #naturereels #hikeyourownhike #waterfallphotography #waterfallhike #waterfallchasing #reelfunny #neature
Follow us on Instagram

It is a delight to work with Kathryn LeMaster. She is a good listener who has been able to help us transition into a smaller home while still keeping the essence of our family intact.

- CINDI C.

My husband and I decided to update our house focusing on the kitchen and bathrooms. We were so impressed from the beginning with Kathryn! She was easy to work with and took our vision and made it all come together! She was extremely professional and we highly recommend her. Thanks Kathryn!! We couldn't be happier!!!

- LAURA D.

I have been doing business with Kathryn for several years, where she had played an integral role to enhance the quality and appeal of the visual impact of our furniture in TV commercial s. She independently picks products that perfectly match each commercial. She is also an absolute pleasure to work with. She is flexible when needed, and always has a positive disposition.

- LAWRENCE ZIGERELLI, PRESIDENT/CEO, FFO HOME

We asked Kathryn to create sets for a food shoot with multiple items. She created sets with for each dish and had them passed them off with the client who was out of town. She was extremely organized and methodical about how she purchased and approved each set. Not only was her work exceptional, her presence made the client feel at ease.

- DERO SANFORD, OWNER, THINKDERO

We highly recommend Kathryn. She listened to us as her clients and executed ideas based upon our design style. We had bought a new house and asked her to help us furnish, design, and style It. We appreciated her detailed drawings and ability to "show" us the vision and plan. She is quick to respond and allows for flexibility based upon timeline needs. Once deciding together on budget, she works toward that goal. She is a lot of fun to work with!

- CHRISTY H.

Kathryn assisted me in styling and accessorizing our new home. She nailed my design ideas and style based on the questionnaire and my comments. I was amazed at how she was able to match my style exactly! It would have taken me years to accomplish what she accomplished in one day. I would highly recommend her and look forward to working with her again in the future.

- BEVERLY R.

© 2023 Kathryn J. LeMaster Art & Design a doodle dog website

rsvp!

Join my e-party and receive a free copy of  my e-book “7 Steps to Design + Decorate like a Pro” as your party favor!