Today I want to give you a glimpse of the design process I went through in creating the Patio Bath in the ASO Designer House. The process is similar to how I begin every project.
If you missed it, be sure to check out my previous post with more before pictures of the space!
 The next thing after thoroughly documenting the space on camera is to document it on paper through measurements and more notes. Mine are always VERY rough sketches and scribbles, but it’s the numbers that count. When I get home and get all of the numbers and scribbles into AutoCAD (drafting software)….

… I can turn this (above)… into this (below):

My drawings are my maps. To start with an accurate, scaled drawing means I’m not going at this blindly. It eliminates so many question marks and protects from wasted time and energy during the selection process. They are the absolute truth that let me see how much space I have between point A and point B, thereby dictating what size light fixture, mirror, frame, rug, etc. I have allowance for.
I put that allowance together with the needs I’m trying to meet within that space functionally and visually. With that information I then know what I need to be looking for when I start selecting. When I select something, I draw it to scale to make sure it’s the perfect fit from a functional stand point, but also from a visual stand point of appropriately filling and balancing within the space
 Switching gears from the technical side of the process to the creative!
I knew I wanted to create something fun and whimsical but at the same time calming. Like a little daydream of sorts! Since designers are responsible for the cost of labor and materials for their rooms in the Show House, I wanted to keep the cost reasonable by using things I already had if possible. I had yardage of these Dwell Studio fabrics on hand. They are some of my absolute FAVORITES that I’d swooned over for years and purchased awhile back with the intention of using them in my Master suite someday.
 Thus began my inspiration for the direction I wanted to take the room. One by one I started thinking of items that would work wonderfully with these fabrics, evoking the feeling I envisioned. Then I’d add the items to my inspiration board.
 An inspiration board is the first method I use when developing a design scheme. It contains anything from general ideas to specific selections. The helpful part of this is getting everything on the same page – literally – so you can get an idea of how it all works or doesn’t work together. It can include everything from specific ideas (the custom shower curtain I designed) to general ideas (a geometric rug).
 Another method I use besides inspiration boards to give me rough idea of what things could look like together is creating a mock-up in photoshop over an image of the actual space. It helps to see things in context of the room.
As each selection checked out from every angle (budget, fit, scheme, deadline) I started ordering, scheduling subcontractors, and spending alot of time on site installing what I could as items arrived. My sweet family showed up time and again to help me out with the install at various points along the way where I could not have done it myself. They are my heros! 🙂
Before I knew it… it was ready!
Don’t miss the reveal tomorrow morning!!
 … while was waiting for my bench to dry, I worked on recovering the bench seat.
 Step 1: Flip over and start pulling up the old fabric from the corners. Work your way around ripping up the fabric. Use scissors, pliers, or whatever tools needed to destroy any stubborn fabric refusing to surrender.
 If there is another fabric layer discovered (like I’ve found on most of the treasures I pick up) simply repeat the stripping process until you uncover the actual “fluff” of the cushion. It should look something like the stripped cushion above.
 Step 3: To add a little extra substance to your cushion, unroll a piece of quilting batting, lay the seat cushion and existing fluff face down on the batting, and cut out a piece of batting around with with about a 2 inch margin for wrapping around. Starting with the corners, wrap the batting tight around the edge and staple into place. Trim any excess batting.
 Covered with a layer of batting, the seat should look something like this.
 Step 4: Roll out your new fabric of choice, face down, over a flat clean surface. Place your batting covered seat cushion face down on the portion of the fabric you want to use. Depending on the pattern, you may want to hold in place and flip over to line up or center the pattern on the seat. (I chose a solid white linen I had extra yardage of from another project.) Cut out your fabric around the seat cushion, with a 3-4 inch margin to give you wiggle room to adjust the pattern placement. Trim off any excess fabric.
 Step 5: Similar to step 3, pull tight, wrap the fabric around the edge, and staple in to place. Begin with a corner, follow with the corner diagonally across from it. Then the third corner, then the last corner diagonally across from it. Picture stretching an artist canvas – you want it pretty tight! Then fill in with as many staples as needed along the edges to hold tight and not pucker. It should now look something like the seat cushion above
 Step 6: This was a total experiment. I wanted to do an insert border of grosgrain ribbon, without cutting, sewing, etc. I would have normally tried ironing it on with Stitch Witchery, but alas, all I had in my cabinet at the moment was Liquid Stitch. (Which was also a total experiment.) I laid out the ribbon where I wanted it, pulling tight, pinning, and pleating to turn corners as I went. Once it was all laid out, I went back and turned up the edges to squeeze the glue under. I removed the fabric pins after the glue had set but was not completely dry.
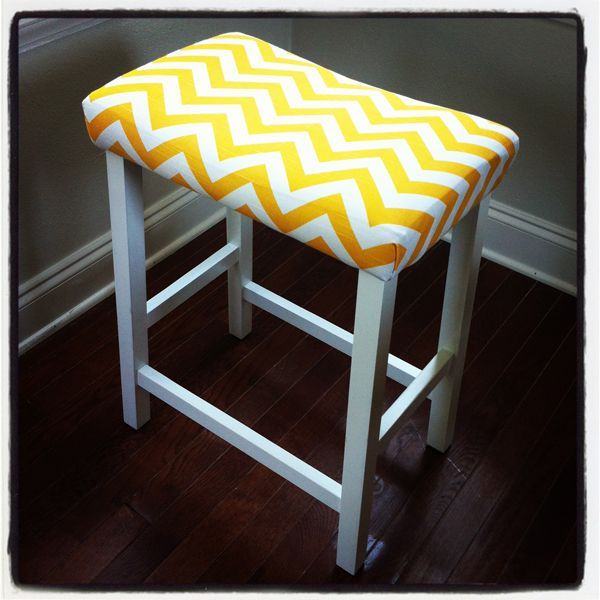
 Step 7: Once the seat cushion and the bench base had both dried enough to handle, they were finally reunited!
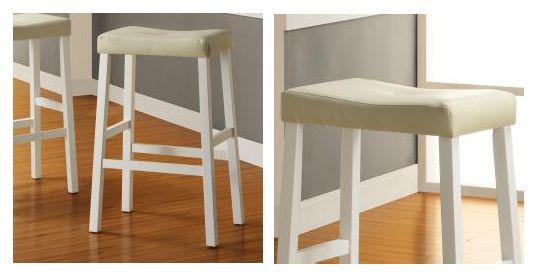
 I started with this sad little bench that I picked up for $10 at an estate sale a couple months ago.
 It was the perfect little bonus piece I needed to fill an empty space in the kitchen to serve as extra pull-up seating, a surface for the purses that get tossed or a shield for the shoes that get kicked off.
 It had potential… just needed a little TLC.
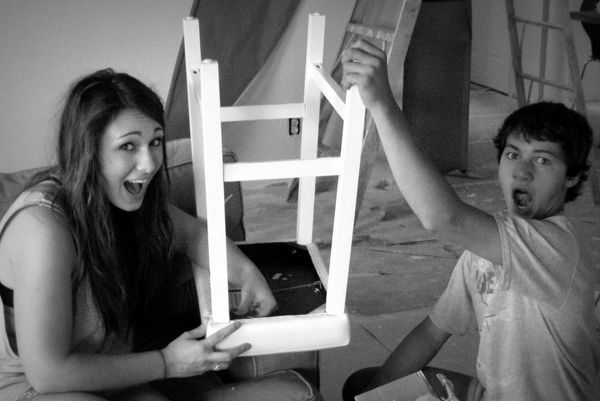
 Step 1: Detach the top from the base, in this case by unscrewing the screw in each corner underneath the bench with a flat-head screwdriver.
 Step 2: Prep the “splash zone” for painting. I layered plastic trash bags over my patio table.
 Step 3a: Assemble the troops. Liquid sander and applicator (rag or paper towels), paint of choice (with corresponding paint tools) and disposable gloves for the splash-inclined like myself.
 Step 3b: Station your trusty guard dog is at his post to keep an eye on things and keep you company. This step is not required, but recommended for a more enjoyable painting experience.
 Step 5: PAINT! (Prime first if needed. I didn’t in this case as I planned on two coats of thick paint, so the first coat was like my primer.) I used a high-gloss oil base paint from Sherwin Williams (color: SW 6938 Synergy) as it was a color I had on hand and had used elsewhere in the kitchen. Oil base is harder to work with and takes longer to dry… but it sure is pretty. For easier clean-up and faster dry-time, I’d recommend latex paint or even spray paint if they have the color you need.
 Step 6: Wait. Follow the dry-time instructions for whichever paint you use. I let the first coat dry overnight, and put a second coat on the next day.